Remote Controlled Car Using Raspberry Pi and Webcam
Setup
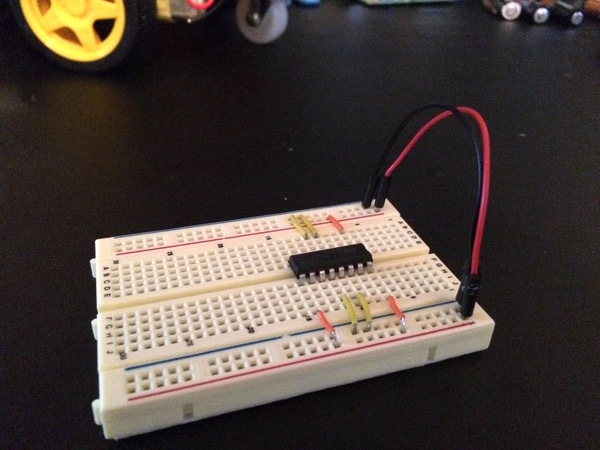
First thing I tackled was setting up the L293D H-Bridge on the Bread Board.
I found myself referencing the following Diagram a couple times.
Step one is connecting your chip down the center of your board:
From here I connected the 3 power pins to my board’s power rail using a few Jumpers :
A few more Jumpers connect each side of the chip to ground:
Finally I use a couple Wires to connect both sides of my power and ground rails:
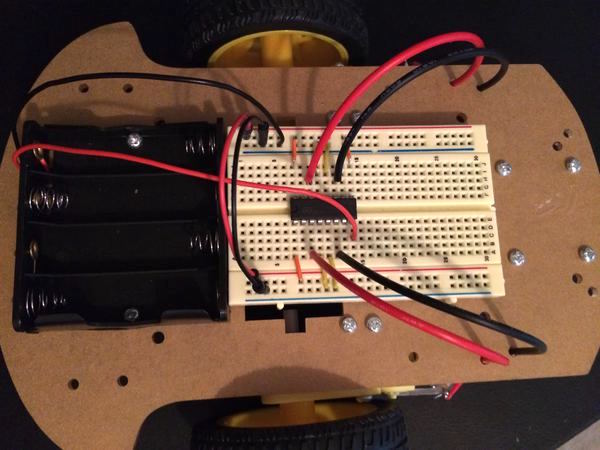
Using a little bit of double sided tape I stick my board onto the Car Chassis :
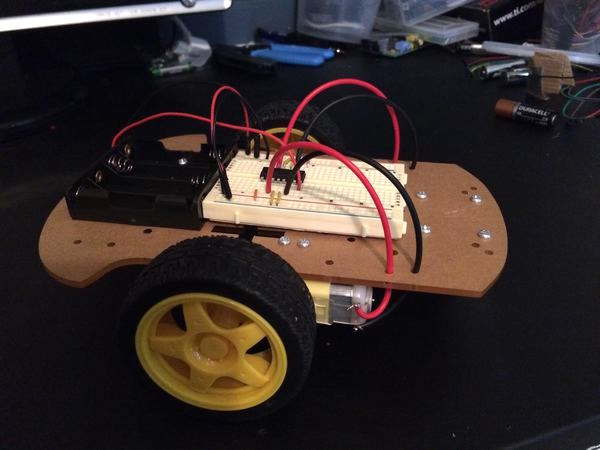
I also wired up each DC motor, and the battery pack to the board:
Next I wired up my Raspberry Pi ’s GPIO pins , connecting them to the L293D .
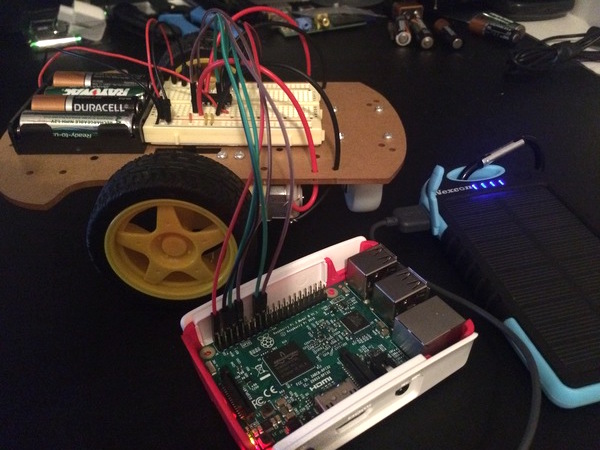
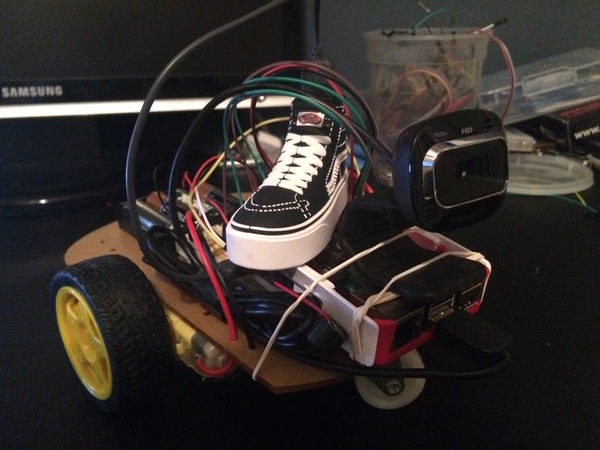
Once I’ve verified the GPIOs were connected properly, I used a couple rubber bands to strap the Pi, Portable USB Charger (I used a Vans Shoe Charger ) and Web Cam to the cassis:
Code
On the Raspberry Pi I’m using Raspbian as the operating system, and installed a couple pieces of software:
My nginx configuration is really basic and looks like this:
server {
 listen 80 default_server;
 listen [::]:80 default_server;

 root /var/www/html;

 location /stream {
   proxy_pass http://localhost:8080/?action=stream;
   proxy_set_header Content-Type "image/jpeg";
 }

 location / {
   proxy_pass http://localhost:8000;
 }

}
The Flask application is a bit janky, but gets the job done:
app.py
import RPi.GPIO as GPIO
from flask import Flask, render_template
from flask import request

GPIO.setmode(GPIO.BCM)

GPIO.setup(14, GPIO.OUT)
GPIO.setup(15, GPIO.OUT)

GPIO.setup(23, GPIO.OUT)
GPIO.setup(24, GPIO.OUT)


app = Flask(__name__)

@app.route("/")
def index():
 return render_template('index.html')

@app.route("/left")
def left():
 method = request.args.get('method')
 if method == 'stop':
 sig = GPIO.LOW
 else:
 sig = GPIO.HIGH

 GPIO.output(23, sig)
 return "OK"

@app.route("/forward")
def forward():
 method = request.args.get('method')
 if method == 'stop':
 sig = GPIO.LOW
 else:
 sig = GPIO.HIGH

 GPIO.output(15, sig)
 GPIO.output(24, sig)
 return "OK"

@app.route("/backward")
def backward():
 method = request.args.get('method')
 if method == 'stop':
 sig = GPIO.LOW
 else:
 sig = GPIO.HIGH

 GPIO.output(14, sig)
 GPIO.output(23, sig)
 return "OK"

@app.route("/right")
def right():
 method = request.args.get('method')
 if method == 'stop':
 sig = GPIO.LOW
 else:
 sig = GPIO.HIGH

 GPIO.output(14, sig)
 return "OK"

if __name__ == "__main__":
 app.run(host='0.0.0.0', port=8000, debug=True)
While the template contains a bit of Javascript to handle button presses:
templates/index.html
 [html]
<html>

<head>

<link rel="stylesheet" href="https://maxcdn.bootstrapcdn.com/bootstrap/3.3.7/css/bootstrap.min.css" integrity="sha384-BVYiiSIFeK1dGmJRAkycuHAHRg32OmUcww7on3RYdg4Va+PmSTsz/K68vbdEjh4u" crossorigin="anonymous">

<style>
 img {
 margin-top: 25px;
 margin-bottom: 25px;
 }
</style>

<script
 src="https://code.jquery.com/jquery-3.2.1.min.js"
 integrity="sha256-hwg4gsxgFZhOsEEamdOYGBf13FyQuiTwlAQgxVSNgt4="
 crossorigin="anonymous"></script>

<script src="https://maxcdn.bootstrapcdn.com/bootstrap/3.3.7/js/bootstrap.min.js" integrity="sha384-Tc5IQib027qvyjSMfHjOMaLkfuWVxZxUPnCJA7l2mCWNIpG9mGCD8wGNIcPD7Txa" crossorigin="anonymous"></script>


<script>


// define our fired states to false
var forward_fired = false;
var backward_fired = false;
var left_fired = false;
var right_fired = false;

// keydown event will start motor
document.onkeydown = function() {

 if(event.keyCode == 87) {

 if(!forward_fired && !backward_fired) {
 forward_fired = true;

 button = document.getElementById('up');
 button.className = 'btn btn-success btn-lg disabled';

 console.log('start forward');
 $.get("/forward")
 }
 }

 if(event.keyCode == 83) {
 if(!backward_fired && !forward_fired) {
 backward_fired = true;

 button = document.getElementById('down');
 button.className = 'btn btn-success btn-lg disabled';

 console.log('start backward');
 $.get("/backward")
 }
 }

 if(event.keyCode == 65) {
 if(!left_fired && !right_fired && !backward_fired) {
 left_fired = true;

 button = document.getElementById('left');
 button.className = 'btn btn-success btn-lg disabled';

 console.log('start left');
 $.get("/left")
 }
 }

 if(event.keyCode == 68) {
 if(!right_fired && !left_fired && !backward_fired) {
 right_fired = true;

 button = document.getElementById('right');
 button.className = 'btn btn-success btn-lg disabled';

 console.log('start right');
 $.get("/right")
 }
 }

};

// keyup event will stop motor
document.onkeyup = function() {


 if(event.keyCode == 32) {
 console.log('beep');
 $.get("/beep")
 }


 if(event.keyCode == 87) {
 if(forward_fired) {
 forward_fired = false;

 button = document.getElementById('up');
 button.className = 'btn btn-default btn-lg disabled';

 console.log('stop forward');
 $.get("/forward?method=stop")
 }
 }

 if(event.keyCode == 83) {
 if(backward_fired) {
 backward_fired = false;

 button = document.getElementById('down');
 button.className = 'btn btn-default btn-lg disabled';

 console.log('stop backward');
 $.get("/backward?method=stop")
 }
 }

 if(event.keyCode == 65) {
 if(left_fired) {
 left_fired = false;

 button = document.getElementById('left');
 button.className = 'btn btn-default btn-lg disabled';

 console.log('stop left');
 $.get("/left?method=stop")
 }
 }

 if(event.keyCode == 68) {
 if(right_fired) {
 right_fired = false;

 button = document.getElementById('right');
 button.className = 'btn btn-default btn-lg disabled';

 console.log('stop right');
 $.get("/right?method=stop")
 }
 }

};

</script>

</head>

</body>


<div class="container">
 <div class="row">
 <center>

 <img src="/stream" class="img-thumbnail">

 </center>
 </div>
</div>

<!-- control buttons -->
<div class="container">
 <div class="row">

 <center>

 <button id="left" type="button" class="btn btn-default btn-lg disabled">
 <span class="glyphicon glyphicon-arrow-left" aria-hidden="true"></span>
 </button>

 <button id="up" type="button" class="btn btn-default btn-lg disabled">
 <span class="glyphicon glyphicon-arrow-up" aria-hidden="true"></span>
 </button>

 <button id="down" type="button" class="btn btn-default btn-lg disabled">
 <span class="glyphicon glyphicon-arrow-down" aria-hidden="true"></span>
 </button>

 <button id="right" type="button" class="btn btn-default btn-lg disabled">
 <span class="glyphicon glyphicon-arrow-right" aria-hidden="true"></span>
 </button>

 </center>

 </div>
</div>

</body>

</html>
I haven’t yet configured the Flask and mjpg-streamer processes to startup automatically, so I connect via a shell and start each in a screen session.
Once that is done connect to the running nginx server using your browser, you should be presented with a user interface similar to this:
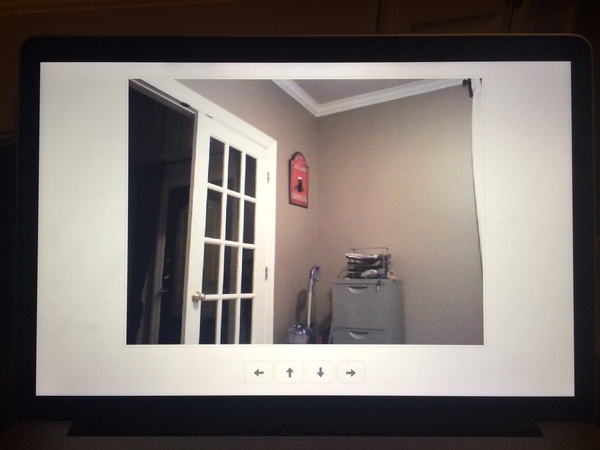 Use your keyboard to control the car, just like a video game the key
W
moves forward,
S
backwards,
A
left, and
D
is right.
Use your keyboard to control the car, just like a video game the key
W
moves forward,
S
backwards,
A
left, and
D
is right.
Component List
Here is a list of each of the components (or comparable) I used during the setup:
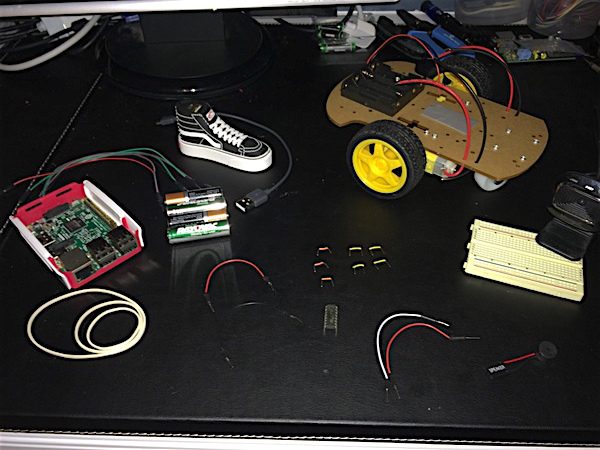
Raspberry Pi 3 Model B Motherboard


Adafruit Dual H-Bridge Motor Driver for DC or Steppers - 600mA - L293D [ADA807]


